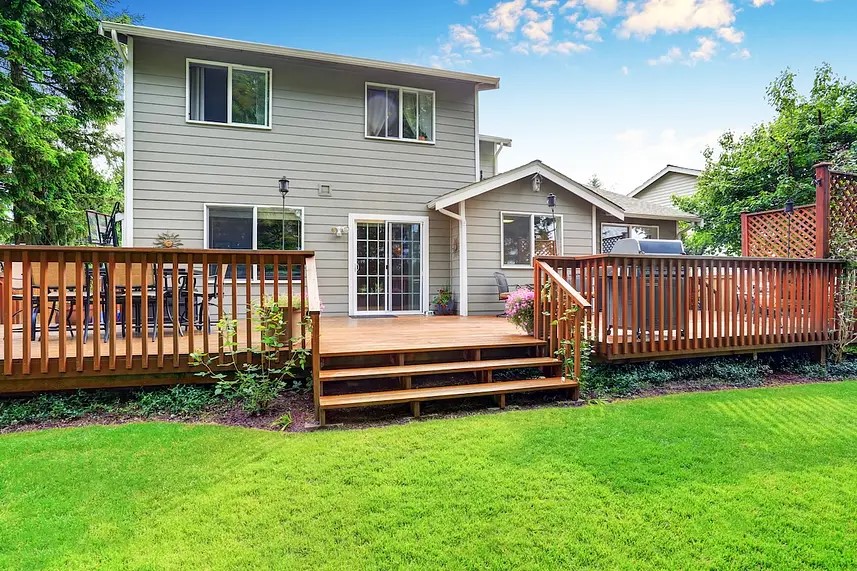
If you’re wondering how to build a deck frame, you’ve come to the right place. Building an outdoor deck is one of the best ways to create a functional and attractive outdoor space for entertaining, relaxing, or enjoying a quiet coffee in the morning sun. The deck frame is the backbone of your decking project. It provides the structural support for your deck boards and ensures your deck is safe and sturdy.
Before we jump into the step-by-step process, here’s what we’ll cover in this comprehensive guide:
- How to prepare your site and gather materials
- The tools and techniques you’ll need to build a solid deck frame
- Tips to ensure your deck beams and rim joist are installed correctly
By the end of this guide, you’ll have the knowledge and confidence to tackle your decking installation and create a beautiful addition to your outdoor space.
Step 1: Gather Your Materials and Tools
Materials You’ll Need:
To get started, you need the following materials:
- Pressure-treated lumber for framing, including joists, beams, and ledger boards
- Galvanized or stainless-steel deck screws
- Concrete footings or deck piers
- Joist hangers
- Weather-resistant deck boards
Tools You’ll Use:
- Measuring tape
- Speed square and level
- Circular saw
- Power drill or driver
- Post hole digger or auger
- Hammer
- Safety equipment (gloves, goggles, and hearing protection)
Having the right materials and tools at hand ensures a smooth and safe construction process.
Step 2: Prepare the Site
Proper site preparation is essential to the success of your deck frame. Always start by planning and laying out where your deck will go. Here’s how you can prepare a sturdy foundation:
Choose the Right Location
Pick a location that’s level, free of obstructions, and where water can drain easily. Keep in mind access to the house, sun exposure, and the intended purpose of your deck.
Mark the Area
Measure and mark the perimeter of your deck using stakes and string to ensure precision. Double-check the dimensions to make sure everything is square.
Excavate and Level
Remove grass or debris from the area and ensure the ground is level. Compact the ground and use crushed gravel where your deck piers or footings will be placed for added stability.
Step 3: Set Your Footings and Posts
The foundation is the most crucial part of your deck frame. Footings and posts provide the necessary structural support to hold the frame in place.
Install Deck Footings
Using a post hole digger or auger, dig holes for your footings below the frost line (this prevents movement during freeze-thaw cycles). Pour concrete into the holes and insert post anchors before the concrete sets.
Secure the Posts
Once your footings are dry, attach pressure-treated 4×4 or 6×6 posts into the anchors. Use a level to ensure each post is perfectly upright before securing it.
Step 4: Attach the Ledger Board
The ledger board is the piece of lumber that connects your deck frame to your house. It provides stability and ties the deck into your home’s structure.
- Mark the Ledger Location: Measure and mark where your ledger board will attach to your home. Make sure it’s level.
- Install Flashing: Place flashing behind the ledger board to protect your home’s exterior from water damage.
- Secure the Ledger Board: Use lag screws or bolts to attach the ledger board securely into the house framing. Avoid attaching it to siding or nonstructural materials.
Step 5: Build the Deck Frame
Now it’s time to assemble the backbone of your deck. This step will determine the stability and durability of your deck, so take your time to ensure accuracy.
Attach Rim Joists
The rim joist forms the outer perimeter of your deck frame. Attach the rim joist to the ledger board using framing nails or screws. Make sure it’s square and level before proceeding to the next step.
Install Deck Beams
Deck beams run parallel to the rim joist and provide additional structural support. Attach them securely to the posts using brackets or special fasteners, and confirm they are level.
Add Joists
Joists are the evenly spaced structural supports that hold up your deck boards. Attach them using joist hangers, ensuring a consistent spacing (16 or 12 inches apart, depending on your deck’s design). Use your speed square to make sure everything is lined up.
Step 6: Secure the Deck Boards
With the deck frame securely in place, it’s time to install the deck boards that will form the walking surface of your deck.
How to Install Deck Boards in 3 Easy Steps:
- Start at the House: Lay your first deck board flush against the house and secure it with screws.
- Leave Gaps for Expansion: Maintain a small gap (1/8 to 1/4 inch) between each deck board to allow for natural expansion with weather changes.
- Continue Laying Boards: Work your way outward, cutting boards as needed to fit around posts or edges. Keep screws flush with the surface of the boards to avoid tripping hazards.
Step 7: Final Touches and Inspection
Before you can enjoy your new deck, there are a few finishing steps to complete.
🪵 Sand and Seal
Sand rough edges or splinters on your deck boards to prevent injuries. Apply a weather-resistant sealant to protect the wood from moisture and UV rays.
Inspect for Safety
Double-check all screws, fasteners, and structural components to ensure everything is secure. Walk across the deck to confirm it’s stable and solid.
Add Railings (Optional)
Depending on the height and design of your deck, you may need to add railings for additional safety.
Why Trust Built Right Roofing and Construction?
At Built Right Roofing and Construction, we believe excellent craftsmanship and customer satisfaction go hand in hand. Whether you’re planning a decking installation or more extensive home repairs, we bring expertise, precision, and dedication to every project.
If you’re ready to start your deck-building project but need expert help, why not reach out to us today? Contact Built Right Roofing and Construction, and let us make your dream outdoor space a reality.
Subscribe to Built Right Roofing & Construction's Blog


Comments